Macrame Plant Hanger Ideas You Can Do Yourself
Low on space? Use plant hangers to create a green roof to your small room and give it a spot of life!
Why A Macrame Plant Hanger Is The Best
They are elegant, simple, delicate, unique, and fun. These are just a few of the words that describe macrame plant hangers! They are always a great project to take up! You can build and improve on them all the time and they are easy to store, clean, and transport. They will give your house a cozy, lived-in, put-together look and you can pride yourself with them every time someone visits and inevitably asks about them! Besides, any potted plant wrapped in macrame becomes a fancy gift to give!
Ideas For A DIY Macrame Plant Hanger
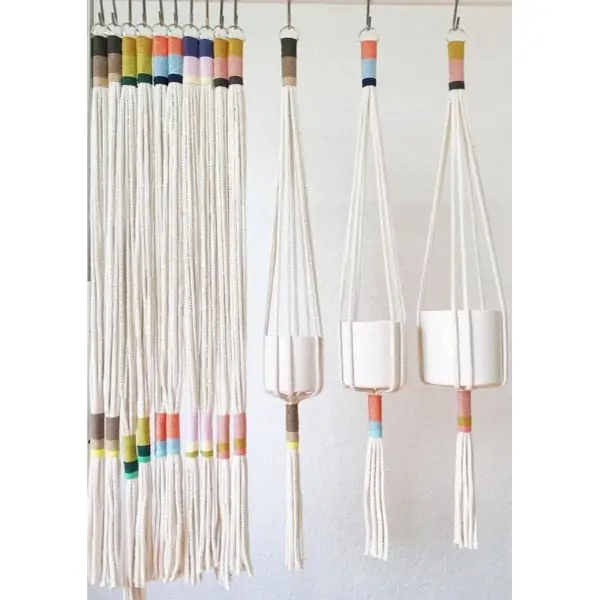
1. Simple and colorful
Create this breathable, minimalist look for your house with a simple hanger. Add a splash of color at the top and bottom using colorful threads to wrap around the main ropes and just nestle the pot in the middle. This design is great for beginners because it looks great and it’s easy to make. It goes great both in Scandinavian-style houses and in crowded rooms and it is a quick solution to keeping poisonous plants away from kids and pets.
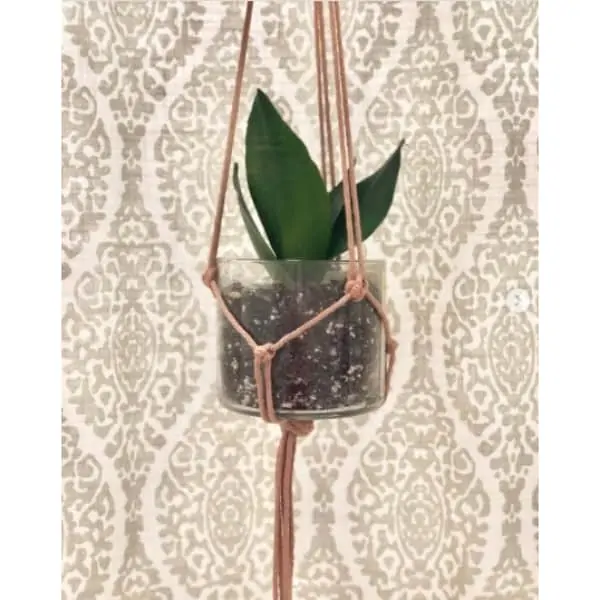
2. Let’s get knotty
Get a little more complex patterns going with these knots. Start with at least six strings and tie them in three sets of two. Then split the sets and tie them in knots with the string next to them. Reunite the original sets of two and tie one final knot, then tie everything together at the bottom. We mentioned this simple hanger when talking about DIY plant stands. It’s a tried and true method and the classics will always have a place in your home!
3. Level up
Using the same method as above, try going for up to ten strings to be split into pairs. Repeat the process of tying together, splitting, then together again on multiple rows to create a deeper, more stable nest for your pot. You can use it in your vertical garden!
4. Start weaving
You are getting better and better at making basic macrame plant hangers. So it’s time to add more texture! Use knots and braids to make the arms of your hanger more intricate, or weave something out of the leftover threads. Once you get at this level, you can showcase any plant you can think of in these hangers! A good, showy, and easy-to-care-for option is the spider plant.
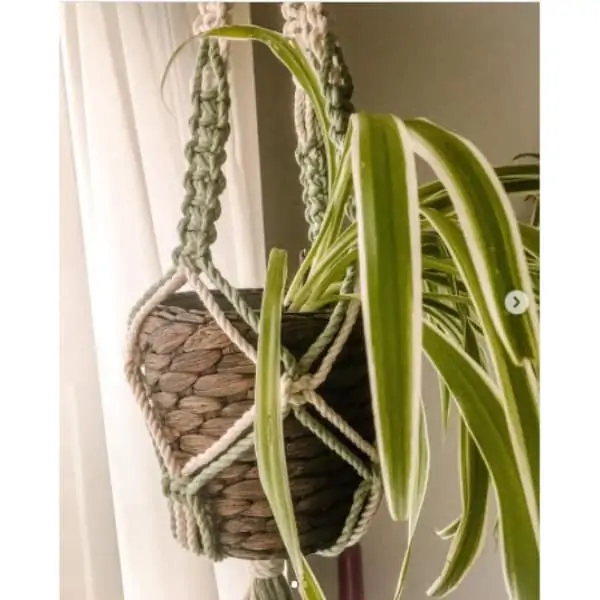
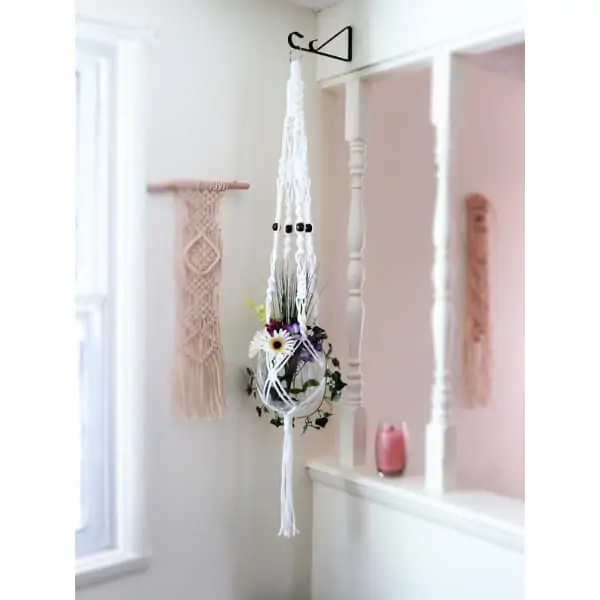
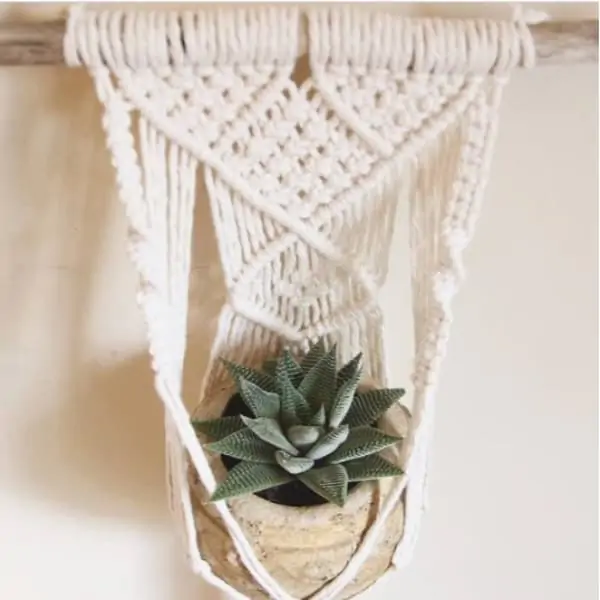
5. Advanced project
Take a look at just how intricate models can get! This is a tiny holder, ideal for a small succulent or an air plant, and it is one of the more complex ones I’ve seen. Notice how it is built on a stick rather than a ring and the way it only curves at the bottom to create the nest! Have a look at it and try to figure out how to make it.
Macrame Plant Hanger Patterns
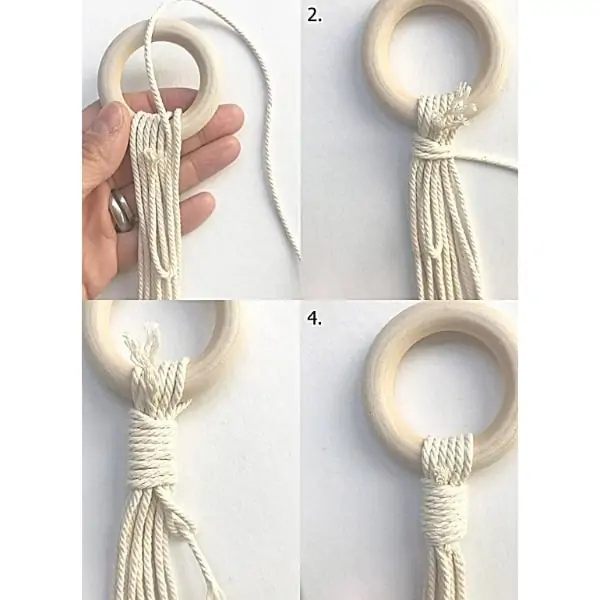
A simple wrap
This is the basic wrap you are going to use to keep all your threads together both at the top and at the bottom. The first idea I suggested is entirely based on this pattern, but you can use it to make your ends look neat and tidy for any other pattern!
Start with a small piece of string and fold it on top of the others as shown in the picture. Wrap it around the bunch tightly, leaving the end free to pull and a loop under the wrap. When you are out of string, stick the running end through the loop at the bottom and pull the free end. That’s it!
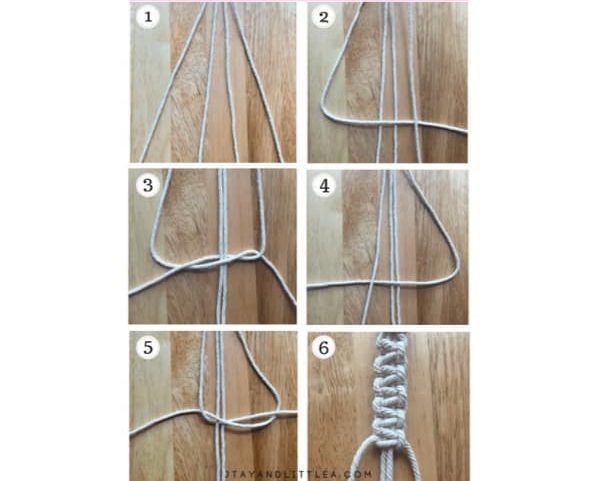
The square knot
This is yet another basic figure, called the square knot or the four knot, because of the shape you make to get it. The result is a straight piece of zig-zag string.
Start with four strands. Take the one on the left and cross it over the next two and under the last one. Then take the string on the right and go under the middle two and over the last one. Pull on the running ends to tighten. Repeat the process in reverse, with the right string going two over and one under, followed by the left one with two under and one over. Continue until you run out of rope or you are happy with the length
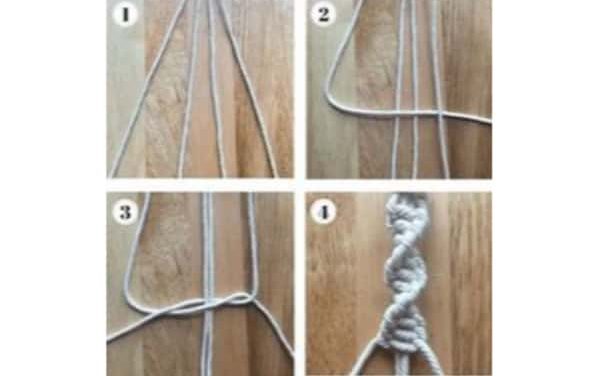
Spiral square knot
This version of the square knot is even easier to make than the previous one. And the result is an impressive looking spiral you can use to decorate your plant hangers.
Just as before, start with making a number 4 shape with left going two over and one under, and continue with right going two under and one over. For the next line, start with left again. Repeat, only starting from the left, and watch the spiral curl!
How To Make A Macrame Plant Hanger
Making your own plant hangers is not as difficult a task as it may seem! All you need is a few basic tools, imagination, time, and patience. Start from the most basic form and then create and imagine whatever patterns and combinations you can come up with!
The basic principle that macrame plant hanger DIY relies on is a pot with a hanging plant resting in the center of at least three ropes tied at each end. From there, the sky is the limit. You can go as simple as that, or as complex as you wish! Keep in mind to use a ring at the top end to make it easier to suspend once done!
You will need
- one wooden or metal ring for each hanger
- cotton string or thin rope
- scissors
- optional: accessories, colors, etc.
- a plant in a pot

Finishing Touches
Go grab your tools and get weaving! Making these macrame plant hanger ideas is a fun project for a dull afternoon alone or with kids. Get creative and let me know what you created in the comments! Happy crafting!